
Table of Contents
- Understanding Probate Property Inspection Basics
- How to Get Access to a Probate Property
- Preparing for a Property Inspection
- The Probate Home Inspection Checklist
- Probate Property Due Diligence and Documentation
- Probate Property Appraisal and Inspection Coordination
- What to Do After You Find Problems
- Frequently Asked Questions
Last Updated: October 16, 2026
Understanding Probate Property Inspection Basics
When someone passes away, their property often enters probate, a legal process where the court oversees the distribution of their estate, and understanding how to inspect a probate property protects your interests. A probate property is real estate owned by a deceased person that’s currently under court supervision.
The inspection differs from a standard home inspection.
At Will Flannigan Real Estate, we’ve guided families through probate sales in the Burbank, Glendale, and Pasadena areas for years. The inspection phase often reveals urgent maintenance issues that can affect the property’s value and insurability.
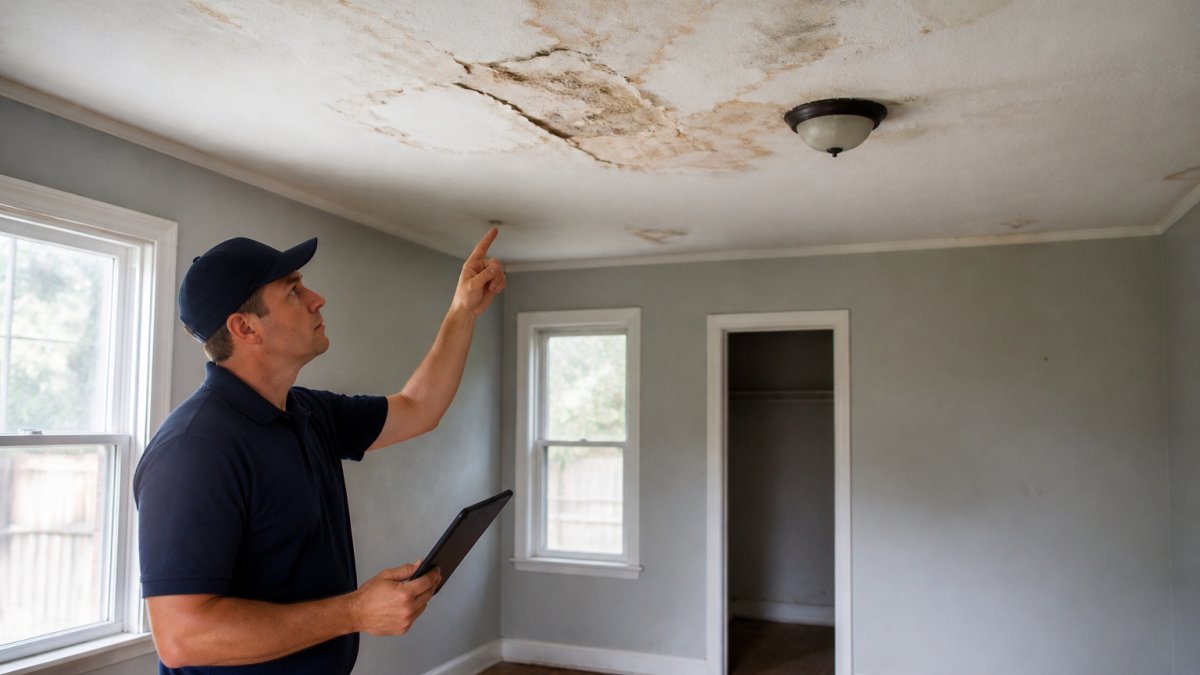
The scope includes structural integrity, essential systems, water damage, safety hazards, and overall condition, documented with photographs and detailed notes. This record becomes part of the estate file and protects you if disputes arise later.
How to Get Access to a Probate Property
Before you can inspect, you need legal authority to enter the property. Access to a probate property depends on who holds the authority to manage the estate.
Who Can Authorize Access
The personal representative (executor or administrator) is appointed by the court and holds the legal right to manage the deceased owner’s property and grant access.
An estate attorney can also authorize access on behalf of the personal representative.
Making Your Access Request
Most personal representatives grant access readily. They understand that a thorough inspection protects the estate.
Documentation of Authorization
Keep a record of who gave you permission and when. This protects you if questions arise about how the inspection was conducted.
Preparing for a Property Inspection
Proper preparation makes your inspection efficient, safe, and thorough.
What You’ll Need
Gather these items before entering the property:
- Flashlight or headlamp (many probate properties lack working lights)
- Notebook and pen for written notes
- Camera or smartphone for photographs
- Measuring tape (25-foot minimum)
- Moisture meter (detects hidden water damage)
- Ladder (for attic and ceiling inspection)
- Gloves and dust mask (for safety in vacant homes)
- Copies of utility bills or property records
- List of known issues or concerns
Safety Considerations
Vacant homes present hazards: mold, structural weakness, broken glass, and pest infestations are common. Never enter a room that appears unsafe.
Do not attempt electrical work, plumbing repairs, or HVAC testing yourself. Document what you see and leave the diagnosis to professionals. Your role is observation and photography, not repair.
Scheduling the Inspection
Plan your visit during daylight hours, since natural light reveals problems artificial light misses.
Allow at least two to three hours for a thorough inspection of an average home. Larger properties or those with known issues may take longer.
The Probate Home Inspection Checklist
A systematic approach ensures you don’t miss critical details. Work from the outside in, then room by room, documenting each area’s condition. The sequence below targets vacant and long-unoccupied homes common in probate, where deferred maintenance and water intrusion are the most frequent findings.
Safety stop rules. Do not enter if you smell gas, see standing water near electrical panels, notice sagging ceilings or floors, or find active pest infestation. Leave, secure the door, and call the personal representative. Your role is observation and photography, not repair or diagnosis.
Exterior and Roof (Observe From the Ground)
- Roof: Note missing, curling, or lifted shingles; sagging ridgelines; and visible patches. Do not climb the roof. Use binoculars from the ground and photograph problem areas.
- Gutters and downspouts: Look for separation, rust-through, and staining on fascia that suggests overflow.
- Exterior walls: Check for cracks wider than a hairline, missing mortar, stucco separation, and staining around windows and doors.
- Foundation: Look for horizontal cracks, step cracks at corners, and soil separation. Note any soft spots or efflorescence (white powder) that suggests moisture movement.
- Drainage: Confirm downspouts discharge away from the foundation and that grading slopes away from the house.
- Attached structures: Inspect garage doors, fences, and patios for rot, leaning, or separation from the main structure.
Attic and Crawl Space (Only If Safely Accessible)
- Attic: Use a headlamp. Look for water stains on rafters and sheathing, daylight through the roof, mold growth, and crushed or missing insulation. Note the presence of any vermiculite-like material and do not disturb it.
- Crawl space: Look for standing water, damp soil, mold, and wood rot at joists and sills. Do not enter if the access is unstable or the space is flooded.
- Basement: Check for water lines on walls, efflorescence, and sump pump condition. Note any musty odor.
Essential Systems (Observe, Do Not Test)
- Electrical panel: Note the panel brand, age if visible, and any signs of scorching, corrosion, or double-tapped breakers. Do not remove the cover.
- Water heater: Note age, rust, pooling water, and whether the unit is strapped. Photograph the data plate.
- Furnace and boiler: Note age, rust, soot, and whether the unit has been serviced. Do not light the pilot or adjust controls.
- Plumbing: Look under sinks for corrosion, active drips, and staining. Check supply lines for brittle or bulging sections.
- Gas lines: Look for corrosion or disconnected flex lines. If you smell gas, leave immediately and call the utility.
- Smoke and carbon monoxide detectors: Note presence, location, and apparent age. Do not test them.
Room-by-Room Interior
- Entry and living areas: Photograph wide shots of each room, then close-ups of stains, cracks, and damaged finishes. Note flooring condition, including cupping hardwood or delaminated vinyl.
- Kitchen: Check under the sink and behind the refrigerator for leaks. Note appliance age and condition. Look for signs of pest activity in cabinets.
- Bathrooms: Check under sinks, around toilets, and at tub and shower surrounds for soft spots, staining, and mold. Note any active drips.
- Bedrooms: Check closets for mold, musty odor, and water staining on ceilings and walls.
- Hallways and stairs: Test handrails and treads for stability. Note loose balusters and uneven steps.
- Doors and windows: Check for broken glass, rot in frames, and difficulty operating. Note any boarded openings.
Safety Hazards to Flag Immediately
- Broken windows and exposed nails or sharp debris
- Unstable stairs, railings, or porch steps
- Standing water near electrical equipment
- Signs of pest infestation, including droppings and nesting material
- Peeling paint in pre-1978 homes, which may indicate lead-based paint
- Missing or non-functional smoke and carbon monoxide detectors
When to Call a Licensed Specialist
Some findings require a licensed professional rather than an observer. Call a licensed home inspector for a full evaluation, a structural engineer for foundation or framing concerns, a licensed electrician for panel or wiring issues, a licensed plumber for active leaks or gas concerns, and a mold assessor for visible mold growth. In Los Angeles County, the California Contractors State License Board maintains a license lookup you can use to verify any contractor before authorizing work. Verify a contractor license
Photograph each finding with a ruler, coin, or tape measure in frame to show scale, and note the room name and date. This makes the report usable for appraisers, insurers, and buyers.
Probate Property Due Diligence and Documentation
Your inspection creates a record that protects the estate. A repeatable system separates a useful estate file from a folder of random photos and supports the personal representative, estate attorney, insurer, and eventual buyer.
Build a Repeatable Photo Log
Use a consistent naming convention so photos match notes months later: property address, date, area, and sequence number (for example, “123Main_2026-10-16_Kitchen_01”). Take three types of photos in every room:
- A wide shot from the doorway showing the overall condition
- A mid-range shot of any area of concern
- A close-up with a ruler or coin for scale
Photograph the exterior from all four sides, the roof from the ground, the electrical panel with the door open, the water heater data plate, and the furnace data plate. These images answer the questions appraisers and insurers ask most often.
Keep Dated Written Notes
Pair every photo set with dated notes recording the date, time, weather, who was present, and what you observed. Note what you could not inspect and why (for example, “crawl space flooded, did not enter”). This record shows diligence and protects the personal representative if questions arise later.
Create a Repair-Priority List
Sort findings into three tiers so the personal representative can act quickly:
- Urgent: Active water intrusion, gas odor, exposed wiring, structural instability, or security breaches. Report the same day.
- Near-term: Roof leaks, failed water heater, non-functional furnace, or significant mold. Schedule evaluation within days.
- Deferred: Cosmetic damage, worn flooring, and minor fixture issues. Document for disclosure and pricing.
Retain Records for the Estate File
Keep the inspection report, photo log, dated notes, repair-priority list, and specialist reports together in the estate file through probate administration and the sale. Coordinate with the estate attorney on retention after closing, since insurers and buyers may request these records months later.
Tie Documentation to Insurance and Disclosure
Notify the property’s insurance carrier of any damage and provide the dated photo log and notes; many policies cover sudden damage but not deterioration from neglect, so the timeline matters. When the property is listed, use the repair-priority list to prepare seller disclosures and respond to buyer inspection requests. In Los Angeles County, sellers generally complete a Transfer Disclosure Statement, and your documentation helps the personal representative complete it accurately.
Coordinate with the Appraiser and Estate Attorney
Share the inspection report and photo log with the appraiser before the valuation visit. Point out areas needing professional evaluation and provide the repair-priority list. Share the same package with the estate attorney so the estate file reflects the property’s condition at each inspection date.
A repeatable photo log, dated notes, and a three-tier repair list turn an inspection into an estate record that supports appraisal, insurance, disclosure, and sale.
Probate Property Appraisal and Inspection Coordination
Your inspection findings directly affect the property’s appraisal value. An appraiser will consider the condition you’ve documented.
Working with Professional Appraisers
If the estate requires a formal appraisal, share your inspection report with the appraiser. Point out areas needing professional evaluation. The appraiser will assess how damage affects market value.
Water damage, structural issues, and system failures reduce value. Documenting these problems prevents disputes about the property’s worth later.
Inspection Frequency
For properties in probate for extended periods, conduct follow-up inspections every 30 to 45 days.
What to Do After You Find Problems
Discovery of damage requires prompt action to protect the property and the estate.
Reporting Urgent Issues
If you discover water damage, mold, structural failure, or safety hazards, report them immediately to the personal representative or estate attorney.
Arranging Professional Evaluation
Significant findings need professional assessment.
Insurance and Liability
Notify the property’s insurance carrier about damage; many policies cover sudden damage but not deterioration from neglect.
Repair Decisions
The personal representative decides whether to repair problems before sale or disclose them.
Inspecting a probate property requires care, documentation, and professional judgment.
Frequently Asked Questions
Can a buyer inspect a probate property before making an offer?
Yes, but only with permission from the personal representative or estate attorney. Most sellers allow professional inspections before offers are submitted because it reduces delays and surprises later. Request inspection access in writing and coordinate through the authorized representative. Some estates require inspections to happen within a specific timeframe during the probate proceedings. Always confirm the property’s probate status and get written approval before scheduling any inspection.
What should you look for when inspecting a probate home?
Focus on water damage, burst pipes, and leaking systems first, vacant homes deteriorate quickly. Check the boiler, HVAC, roof, and foundation. Look for damp patches, ceiling stains, and signs of pest damage. Document safety hazards like exposed wiring or broken stairs. Photograph every room and take notes on the property’s overall condition. Unoccupied properties often have unknown defects that only surface during a detailed walkthrough, so be thorough and systematic.
Who can authorize access to a probate property?
The personal representative (executor) or the estate attorney has authority to grant access. Contact them in writing with your inspection request and proposed dates. They may require proof of your interest in the property and may attend the inspection themselves. Some estates have strict access windows or require advance notice of 7 to 14 days. Never enter a probate property without explicit written permission from the authorized party.
How detailed does a probate property inspection need to be?
A probate property inspection should be comprehensive because the home may have been vacant for months. Document the property’s condition systematically: photograph every room, note all damage, test essential systems, and identify maintenance needs. Create a written record of your findings for the estate file and future appraisal. This level of detail protects the estate, helps determine property value, and supports any insurance claims or liability issues that may arise during administration.